Building, testing and releasing native iOS apps using Codemagic
Table of Contents
Introduction #
Having used GitHub Actions for my CI/CD needs in the past, I was curious to see how Codemagic compared, so I gave it a try (note: I have yet to test Xcode Cloud).
Codemagic is designed with a user-friendly interface that makes it easy to navigate and set up your CI/CD pipeline. It supports a wide range of mobile platforms, including iOS, Android, React Native, Cordova, Ionic and Flutter. There is also a comprehensive documentation that guides you through the process of setting up your pipeline step by step.
Pricing #
Codemagic offers various pricing plans but I went with their (pretty generous) free tier, which includes:
- 500 build minutes / month
- macOS M1 VM (Apple M1 chip / Mac mini 3.2GHz Quad Core / 8GB)
- max 120 minutes build timeout (maximum duration of a single build)
Which seems like a great starter plan for personal or hobby projects.
Setup #
After signing up, follow these steps to setup your first application:
- Head over to the apps page and click on Add application
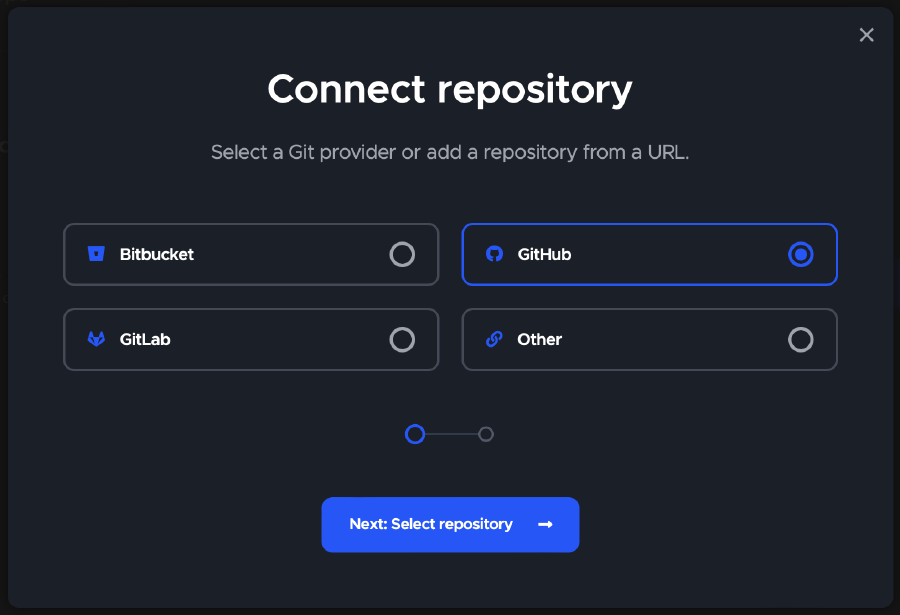
- Select your Git provider (I use GitHub) and your repository. Note that adding repos from GitHub requires authorizing Codemagic and installing the Codemagic CI/CD GitHub App to a GitHub account.1
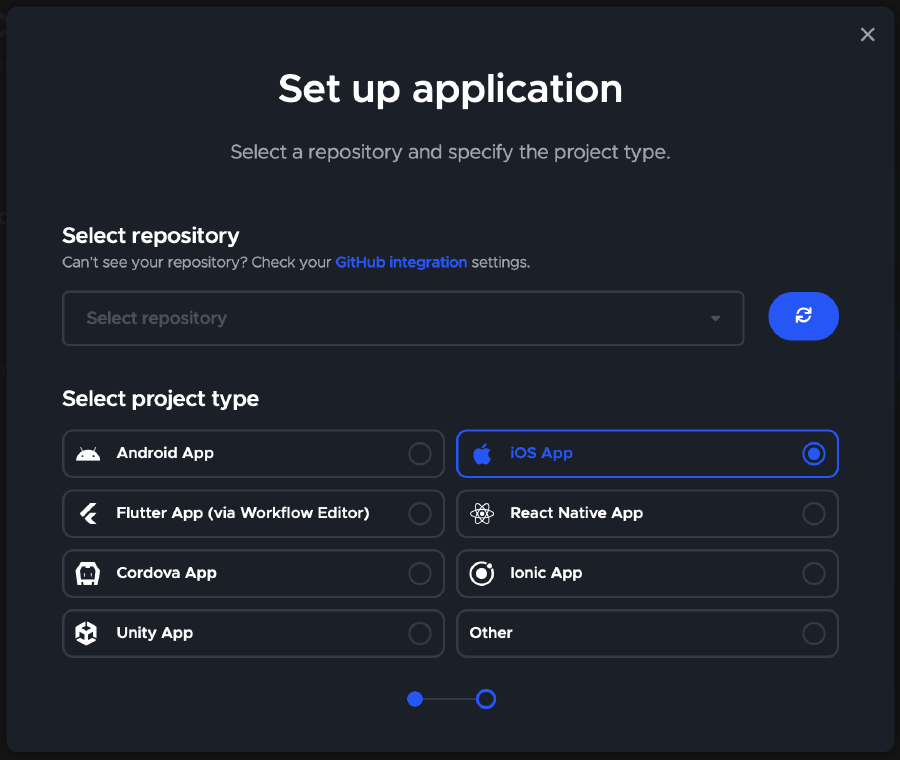
- Specify the project type (iOS App in my case) and click Finish: Add application.
Configuration #
In order to configure your CI/CD with Codemagic, you need to add a file named codemagic.yaml to the root directory of the repository and commit it to version control.
You can find extensive documentation for the YAML syntax and various usages of the configuration file.
When detected in the repository, codemagic.yaml is automatically used for configuring builds triggered in response to the events defined in the file. Builds can also be started manually by clicking Start new build in Codemagic and selecting the branch and workflow to build in the Specify build configuration popup.2
The Codemagic YAML file #
Here’s the codemagic.yaml I ended up using for my native iOS app (you can also find it on my GitHub repository):
1workflows: 2 build: 3 name: iOS Build & Test 4 max_build_duration: 15 # in minutes 5 instance_type: mac_mini_m1 6 triggering: 7 events: 8 - push 9 - pull_request10 scripts:11 - name: Build12 script: |13 xcodebuild build \14 -project "Stats.xcodeproj" \15 -scheme "Stats" \16 CODE_SIGN_IDENTITY="" \17 CODE_SIGNING_REQUIRED=NO \18 CODE_SIGNING_ALLOWED=NO19 - name: Extract .ipa (unsigned)20 script: |21 mkdir Payload22 cp -r $HOME/Library/Developer/Xcode/DerivedData/**/Build/Products/Debug-iphoneos/*.app Payload23 zip -r build.ipa Payload24 rm -rf Payload25 artifacts:26 - build.ipaThis YAML file is setting up a workflow for a continuous integration and continuous deployment (CI/CD) pipeline for an iOS app written in Swift. The pipeline is triggered by events such as a push to the repository or a pull request, and it runs on a mac_mini_m1 instance type.
- The workflow has a single job called iOS Build & Test that is set to run for a maximum of 15 minutes. The job consists of two scripts:
- The Build script is running the
xcodebuildcommand to build the project named “Stats.xcodeproj” with the scheme “Stats”. Some flags are passed to avoid code signing, which I didn’t need - The Extract .ipa (unsigned) script creates a
Payloaddirectory, copies the app files from the build folder to thePayloaddirectory, creates an.ipafile from thePayloaddirectory, and then deletes thePayloaddirectory
- The Build script is running the
- Finally, the job defines an artifact, which is a file that can be generated by the pipeline and will show up later in the builds section. In this case, it’s the
build.ipaextracted earlier.
Builds #
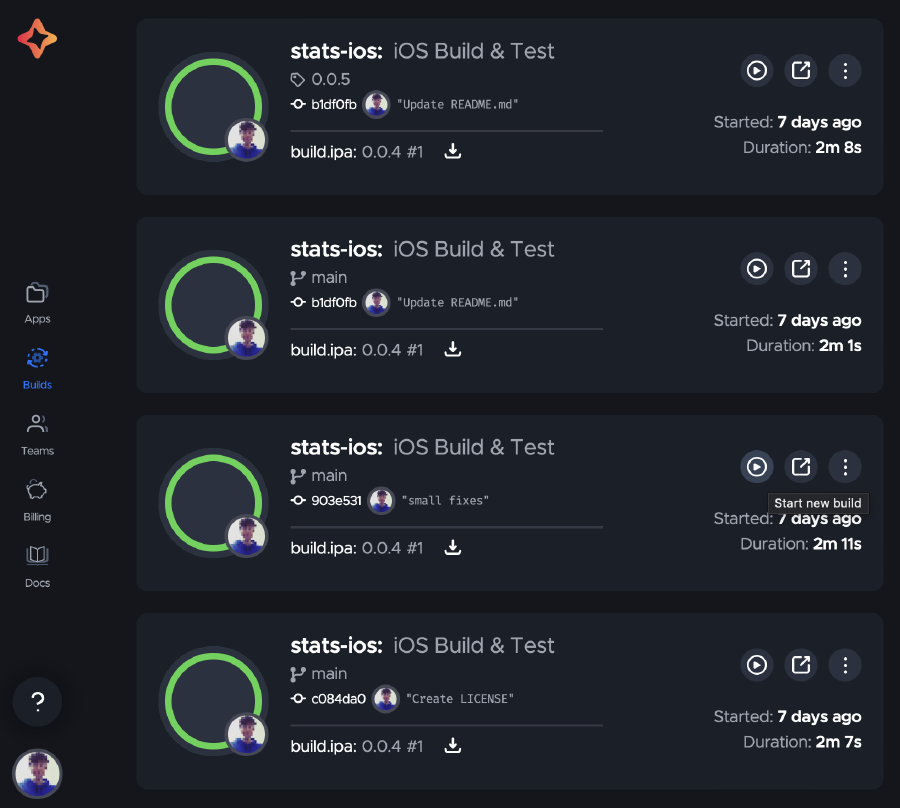
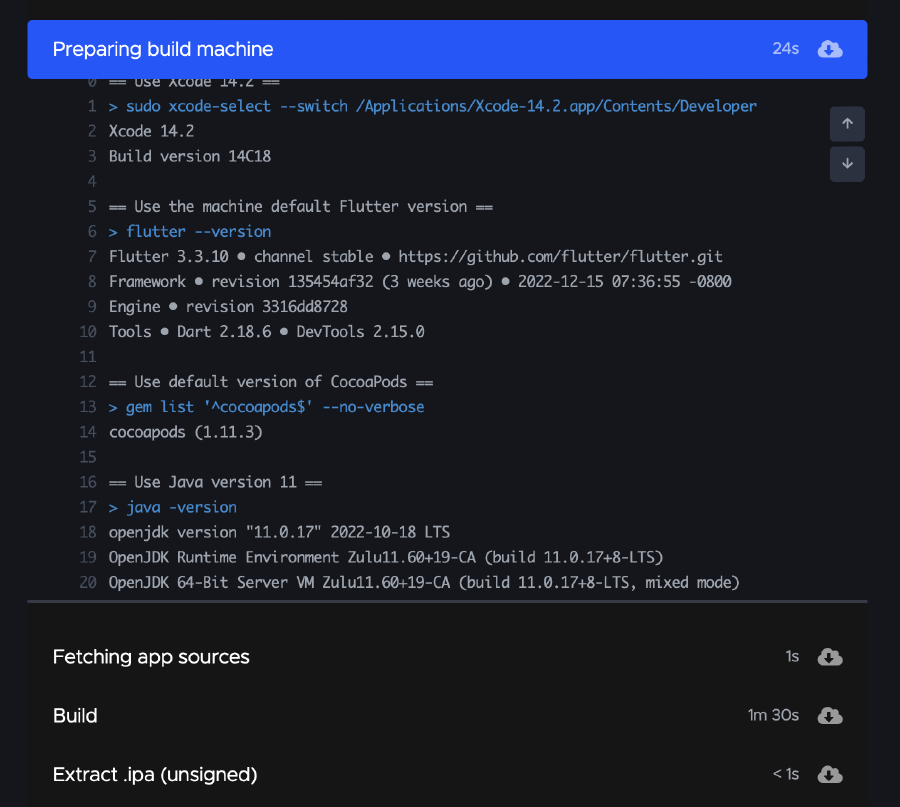
Your app’s builds will show up in the builds page, along with their status and eventual artifacts that can be downloaded. Logs can be viewed for each build to investigate issues.
My builds averaged 2 minutes of compute time (note that I skipped the whole iOS signing setup though), which is very fast for a free tier, thanks to the M1 machines.
Automated GitHub releases on Git tag push #
The codemagic.yaml configuration is very powerful and has lots of integrations. A great use case is deploying an app to Github releases for successful builds triggered on tag creation.
To setup deployments to GitHub releases:
Your app needs to be hosted on GitHub
Use git tags (won’t work with commits)
Add your GitHub personal access token to Codemagic’s environment variables (see documentation)3
- Open your Codemagic app settings, and go to the Environment variables tab.
- Enter the desired variable name, e.g.
GITHUB_TOKENand enter the token value as Variable value - Create a new Group and give it any name (i.e.
GitHub). Make sure the Secure option is selected and add the variable:
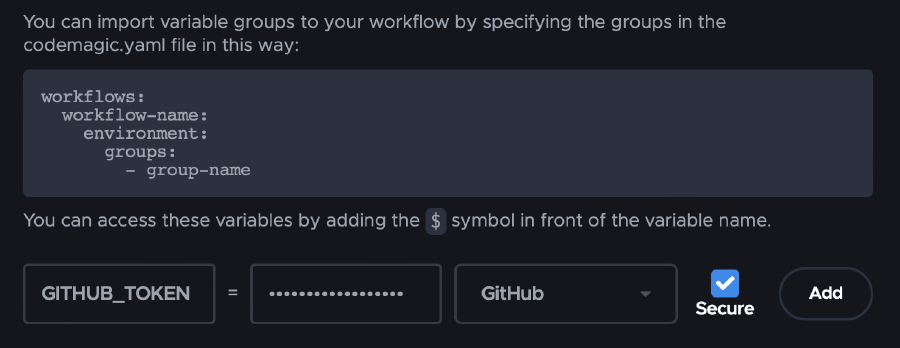
- Include the group name in your
codemagic.yamland configure build triggering on tag creation. Don’t forget to add a branch pattern and ensure the webhook exists:
1workflows: 2 build: 3 environment: 4 groups: 5 - GitHub 6 triggering: 7 events: 8 - tag 9 branch_patterns:10 - pattern: "*"11 include: true12 source: true- Add the following script after the build or publishing scripts (edit the build artifacts path to match your setup):
1- name: Publish to GitHub Releases w/ artifact 2 script: | 3 #!/usr/bin/env zsh 4 5 # Publish only for tag builds 6 if [ -z ${CM_TAG} ]; then 7 echo "Not a tag build, will not publish GitHub release" 8 exit 0 9 fi10 11 gh release create "${CM_TAG}" \12 --title " ${CM_TAG}" \13 build.ipaYou can find more options about gh release create usage, such as including release notes, from the GitHub CLI official docs.
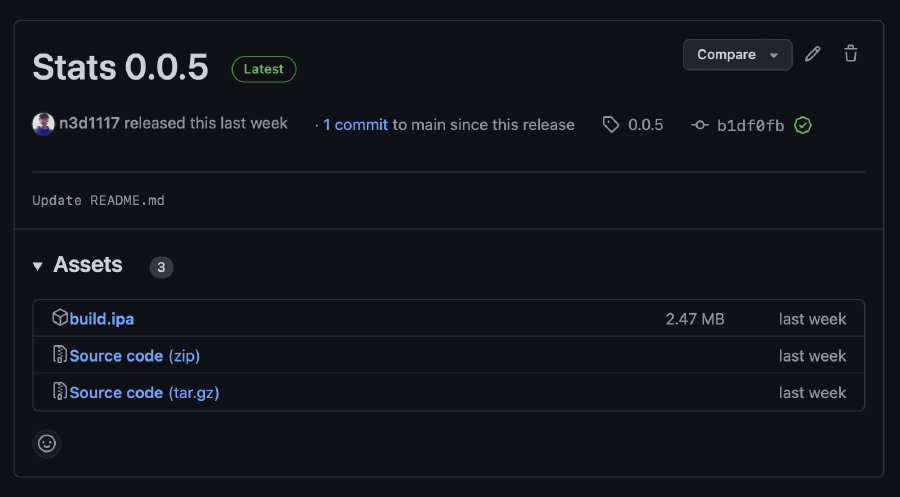
Upon a tag push and successful build, here’s how the release looks like on the GitHub website:
Testing #
Sadly, adding automated testing to my Codemagic configuration did not go as planned.
As per documentation, I added the following script to the scripts configuration section, before the build commands:
1- name: Automated tests 2 script: | 3 #!/bin/sh 4 set -ex 5 xcode-project run-tests \ 6 --project "Stats.xcodeproj" \ 7 --scheme "Stats" \ 8 --device "iPhone 11" \ 9 --test-xcargs "CODE_SIGNING_ALLOWED=NO"10 test_report: build/ios/test/*.xmlHowever, despite my relatively simple test suite (13 unit tests), I noticed some mixed results on my builds:
- Sometimes, tests passed but took way too long (over 8 minutes, whereas the build step usually takes less than a minute and a half)
- In other instances, tests timed out after taking longer than 15 minutes
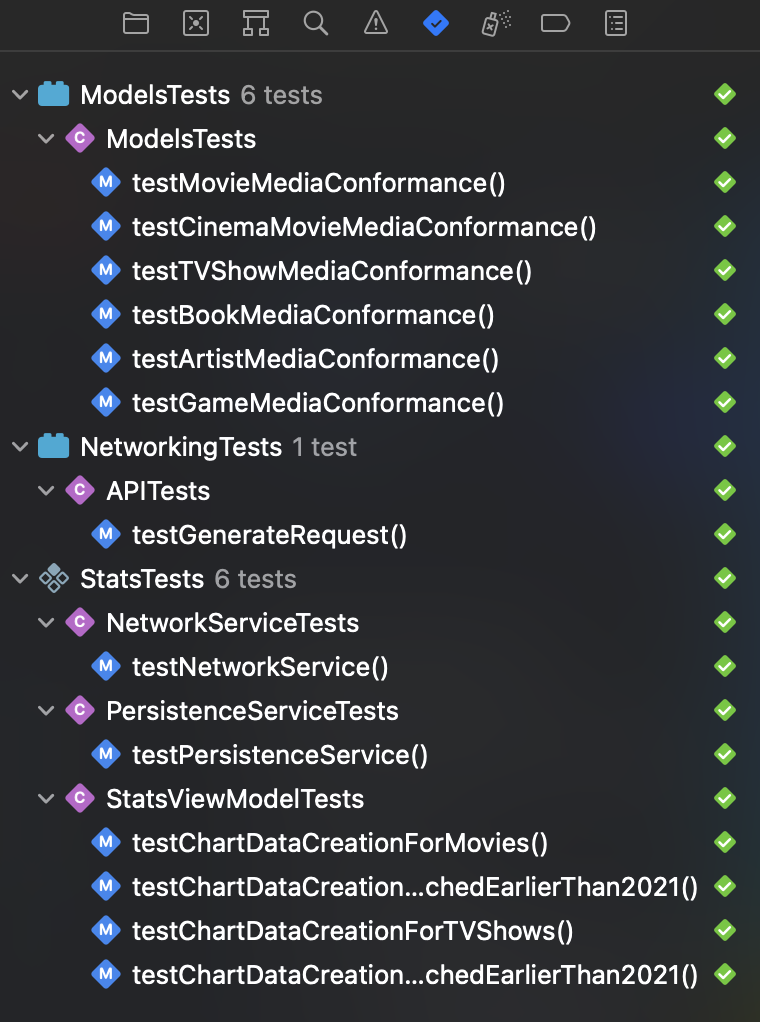
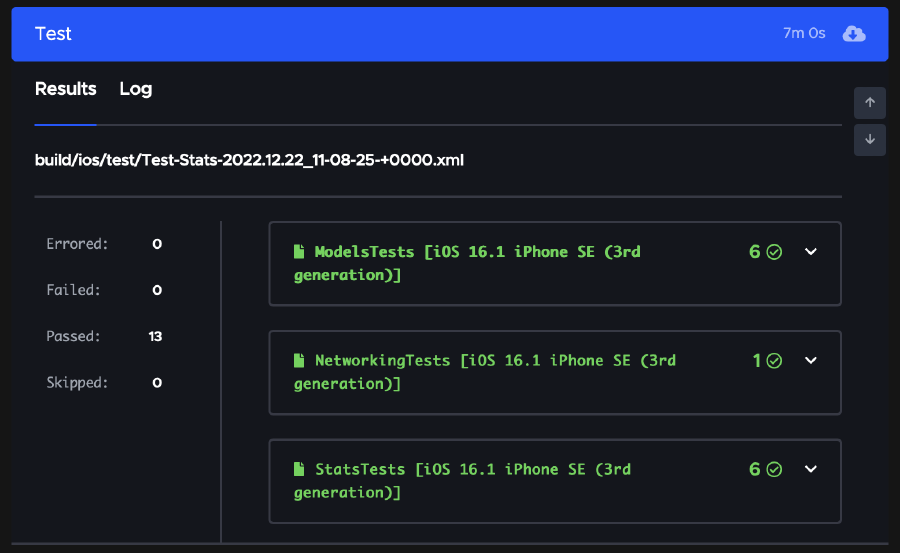
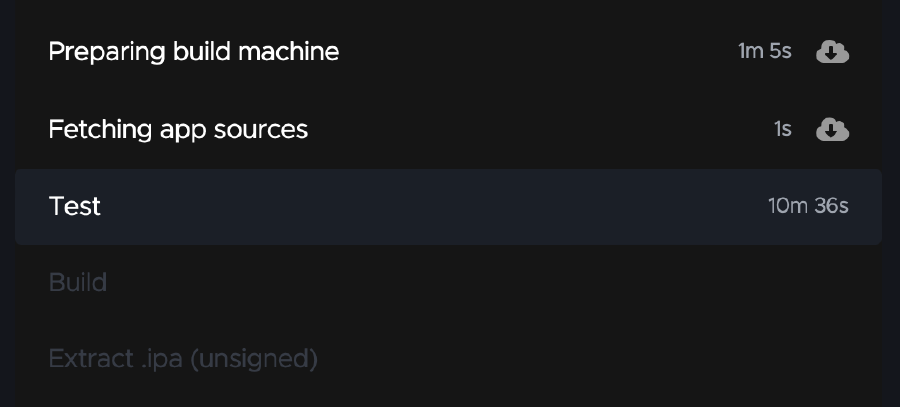
It could be that the issue for these flaky tests lies in my configuration, I didn’t have time to investigate further. I simply commented out the test script for now.
Conclusion #
My experience using the Codemagic platform to set up continuous integration, testing and automated deployments for a native iOS app written in Swift so far has been positive:
- Many platforms are supported
- Performance is great even for the free tier, especially when compared to GitHub actions
- Build machines and tools like Xcode are regularly updated
- My use case was very limited, but Codemagic offers a ton of integrations for common actions (iOS code signing, build notifications, Fastlane, Jira, artifact publishing, REST APIs and much more)
- Good community support on their Discussions page
Although I could not get my tests to run reliably, I still recommend giving Codemagic a try. 🥳
Codemagic docs: Adding apps to Codemagic. ↩︎
Codemagic docs: Using codemagic.yaml. ↩︎
Codemagic docs: Github Releases with codemagic.yaml. ↩︎